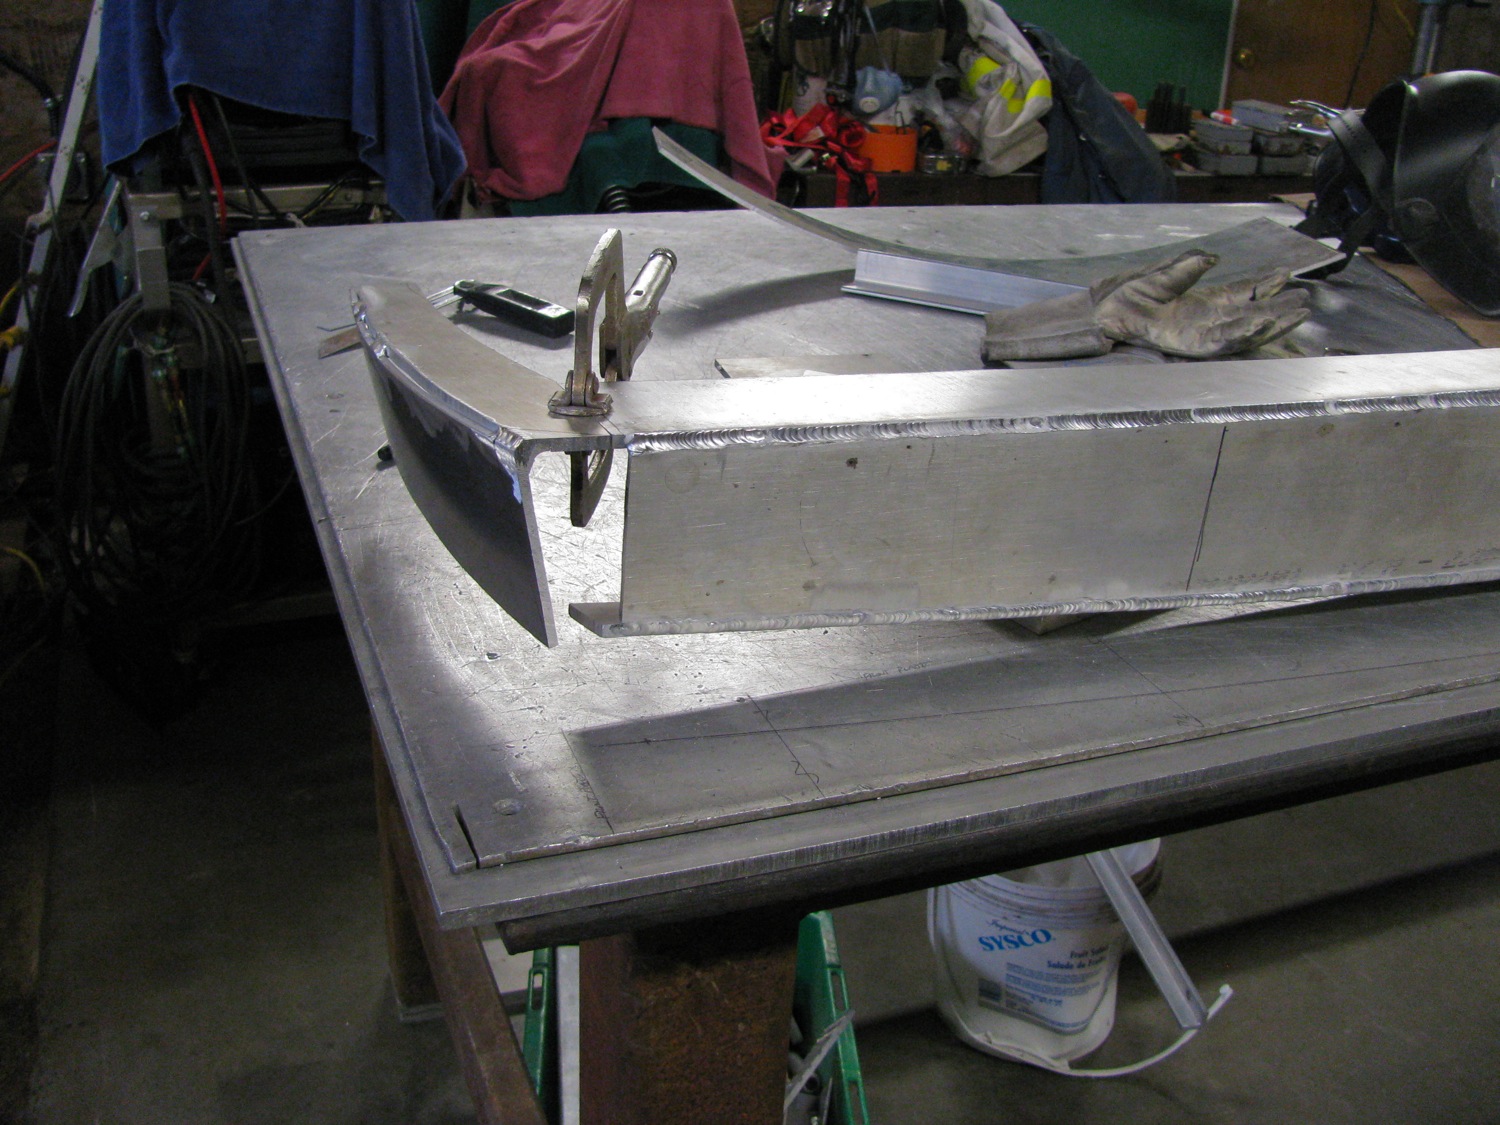
Didn’t get much done today, just worked on one end cap. I had thought about making a mock-up from door skin or cardboard but instead I went ahead mocking up with aluminum (1/4″ for top and bottom, 3/16″ for the face plate).
The 3/16″ face plate (vertical plate) was from a bit of scrap that was curved, large radius. I cut some 1/4″ plate for top and bottom and tacked them on. Then clamped the affair to the bumper.

It’s a trick transition, and you will see later that I still haven’t figured it out. I cut a bit of 1/4″ to fill the hole.
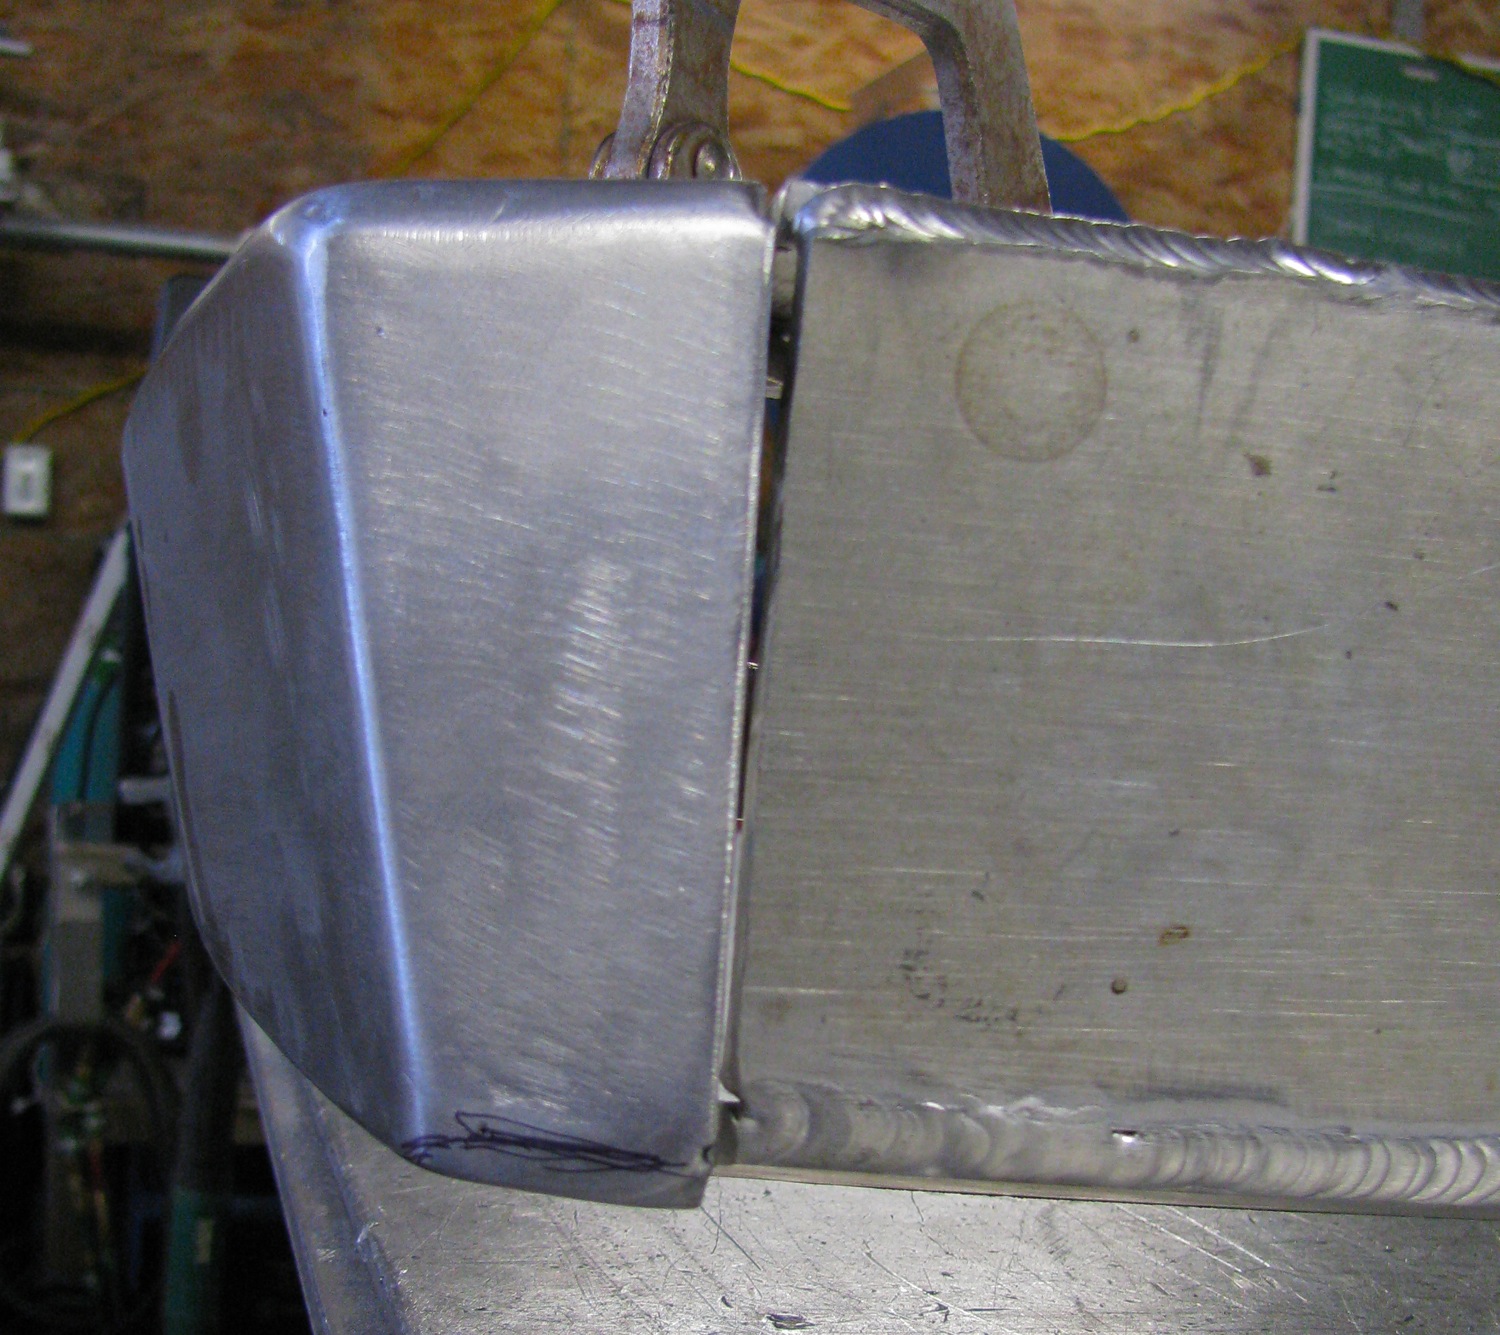
I couldn’t resist rough grinding a radius on the welds.

Another view.

Side view.

The corner filler bit is obvious in this pic.

I’m quite there yet, am I?

“if you can jump it, I can weld it”… ha!
I tacked the end cap to the bumper so that I could remove the clamp and took the bumper out to the van to see how it fit. Up until this point I was only guessing the dimensions of the end cap – I wanted it to end up about an inch behind my mudflaps and about 1/4″ from the body. Turned out I had to thin the endcap down a bit, was hitting the body.
So it was “MIller time!”! One tool that gets a lot of respect and care in use. Nasty bit of work but cuts the aluminum nicely. What’s with the rust on the blade? Must have got splashed with water, and we don’t put any oil or the like on tools that will be touching aluminum or stainless for fear of weld contamination.

Slimming things down.

I think it looks nicer than the first version.

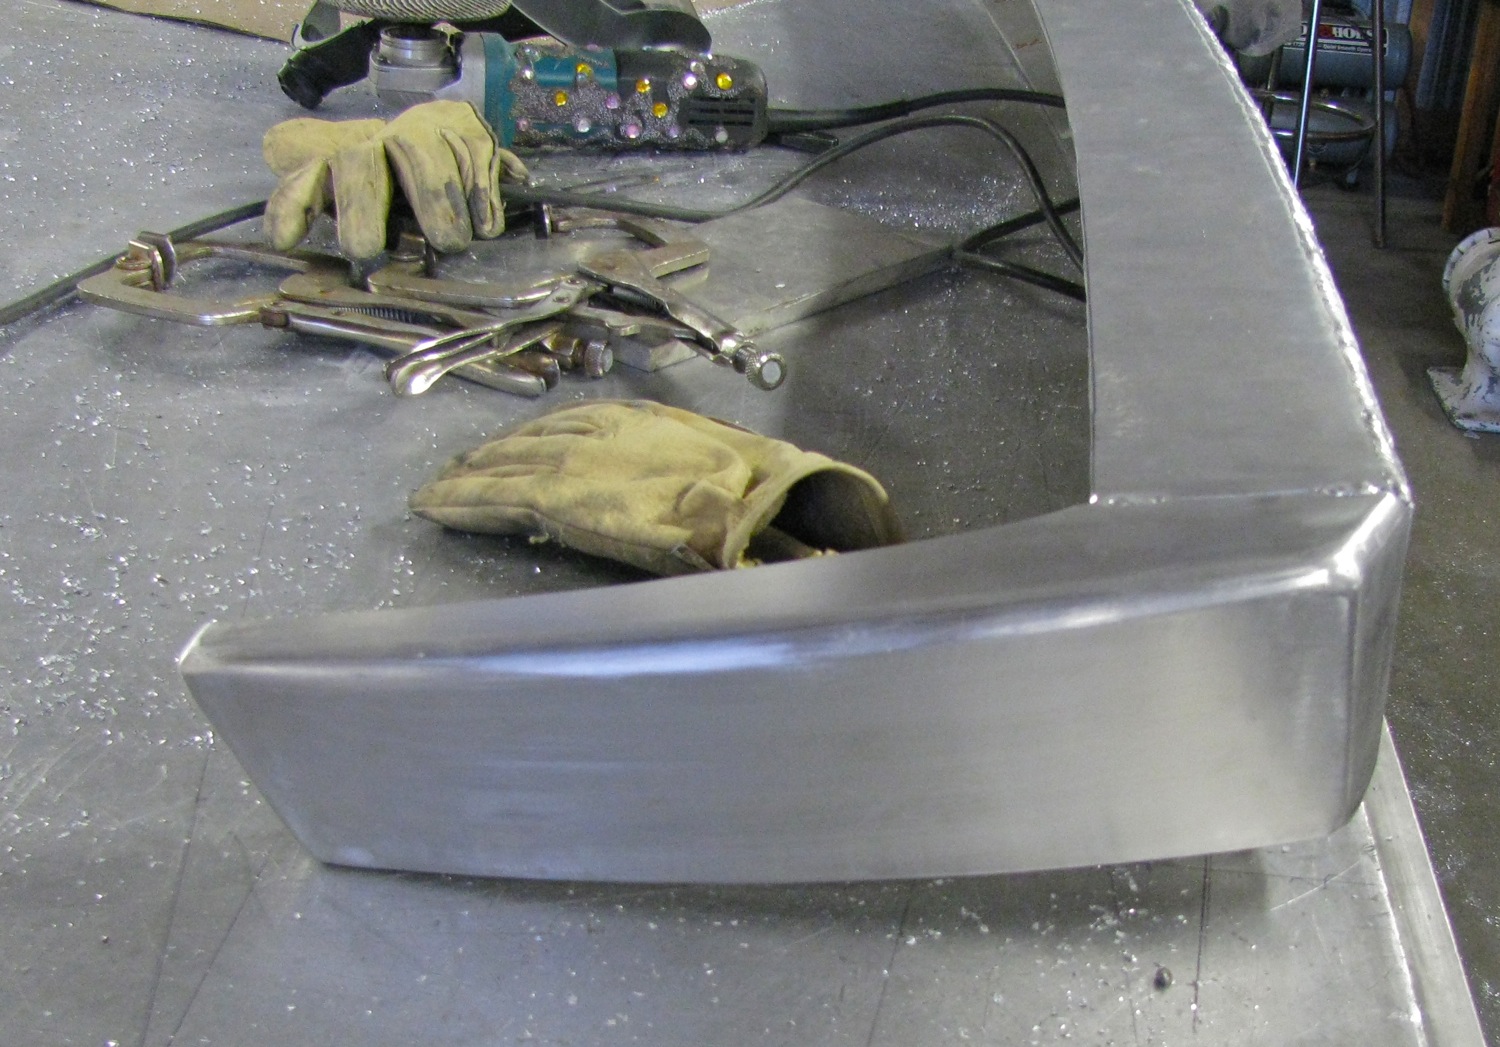
And it fits to the van like I want it to.

I will have to zip cut the front of the endcap and re-form it to make the transition to the lower plate of the bumper. But I’m liking how things are going.

#1 by edbee on August 2, 2013 - 8:14 pm
Hey Alistair,
2 comments:
#1 – wow, you do nice work!
#2 – must be nice having the time for such projects
ok, 3 comments: WOW, you really do nice work!
🙂
Ed
#2 by albell on August 2, 2013 - 8:17 pm
Thanks Ed. Time, well the last couple of days are slow in the shop (see the hull still on the table?). So I grabbed the chance to do the bumper.
cheers
ab
#3 by Joel on August 2, 2013 - 8:59 pm
I’m impressed. How does one have material like that just lying around? I’m impressed by the Aluminum welding, the nice shape of the bumper.
Is this going to have a swing arm mounted on top?
#4 by albell on August 2, 2013 - 9:45 pm
Most of the time I pick up aluminum from the local metal recycling yard. It’s surprising what you can find – off cuts from water jet jobs, shafting, tubes etc. This time I used scrap that has been hanging around where I work. Mostly off cuts (ie what is left from a sheet after parts cut on water jet) from jobs and that seem too good to send to re-cycler.
Yes, Ih want to rig up some sort of swing away tire carrier. I want it to be on bumper only, no body mount. I haven’t thought it through yet.
cheers
ab
#5 by famillysyncro on August 2, 2013 - 9:46 pm
It looks really good but I have a preference for those weld to be visible……
#6 by albell on August 2, 2013 - 9:51 pm
not with my welds.
I like the seamless look, almost as if it were cast.
cheers
ab
#7 by presslab on August 3, 2013 - 12:50 am
Looking forward to seeing how it turns out.
Where can I get a cut-off wheel like that?
#8 by albell on August 3, 2013 - 5:50 am
Hi,
the carbide blade on angle grinder? Amazon has something
But for god’s sake be careful, keep the guard on. If you use an angle grinder, you know how the disc can jump or pull on you depending on what quadrant of the disc is cutting. So imagine the toothed blade….
cheers
alistair
#9 by presslab on August 3, 2013 - 1:56 pm
Hmm, not much out there I guess. I found this one after a bit of searching:
I have a cold saw with a big carbide blade and it’s great!
I don’t call angle grinders the “spinning wheel of death” for nothing; I always keep the guards on. But yes, I can see what you mean. 🙂
#10 by albell on August 3, 2013 - 2:17 pm
That one looks like it has a bit of an anti-kick back shape behind the carbide. We use angle grinders all the time, mostly with blending disks (http://www.walter.com/Walter/en-ca/abrasives/blending-abrasives/angle-grinders-steel-stainless/enduro-flex) and aluminum specific stones. The only grinders we have the guards on are the ones with the carbide blades 🙂
cheers
ab
#11 by Pz on August 3, 2013 - 1:30 pm
Great looking end-cap(s) Alistair.
Artistry….!
Pz
#12 by albell on August 3, 2013 - 2:19 pm
Artistry Phil? Does that mean you accept my judgement on the combibox 250?
🙂
ab
#13 by Pz on August 4, 2013 - 12:10 pm
NO Alistair!
Combibox 250 is antithetical to building your wonderfully executed, custom made bumper.
Perhaps compensating for the weight penalty paid in that luddite old-school rocket box?
I will accept… the 250 is a cave of a box. Could store enough crap to make the Syncro top heavy? Alistair may want to reevaluate making the bumpers out of lead.. act as a keel
to the Combibox 250 boat anchor..?
Pz:)
#14 by albell on August 5, 2013 - 10:14 pm
The venerable, yes venerable, Combibox 250 survived this last weekend trip (short blog post coming) with flying colours. Bashed through overhanging alders, stayed on the van over rough roads, carried a metric butt-load of gear.
It even was workable without a ladder, just standing on the rear tire to gain access. Thanks to the integrated lid support, golds the lid open securely. Do the flimsoid new boxes have lid supports?
ab