I’ve been wanting to have some led strip lighting in the van for a while but never got around to ordering any online. But a few weeks ago I found some led strips at local hardware store and even being on sale they were pricey ($43 each), but I fell for them. You can do much better price-wise online.
The strips are 2 m long each, with 60 smd leds per strip. That’s a good led density for this application. Calling leds “warm white” is so subjective, a little better descriptor is colour temperature, and these were listed as 3500 K correction, 3000 K. The strips came with a small inline transformer to change 110V AC to 12 V DC. We don’t need that for the van, but we do need some sort of switch. I decided on an inline dimmer/controller from Superbrightleds.com, this one. I ordered 2, one for each strip. When they arrived I realized that perhaps an inline dimmer is not the best way to go, would be better to have a wall mount. Time for some metal butchery. The same old thing with me, going the long way around.
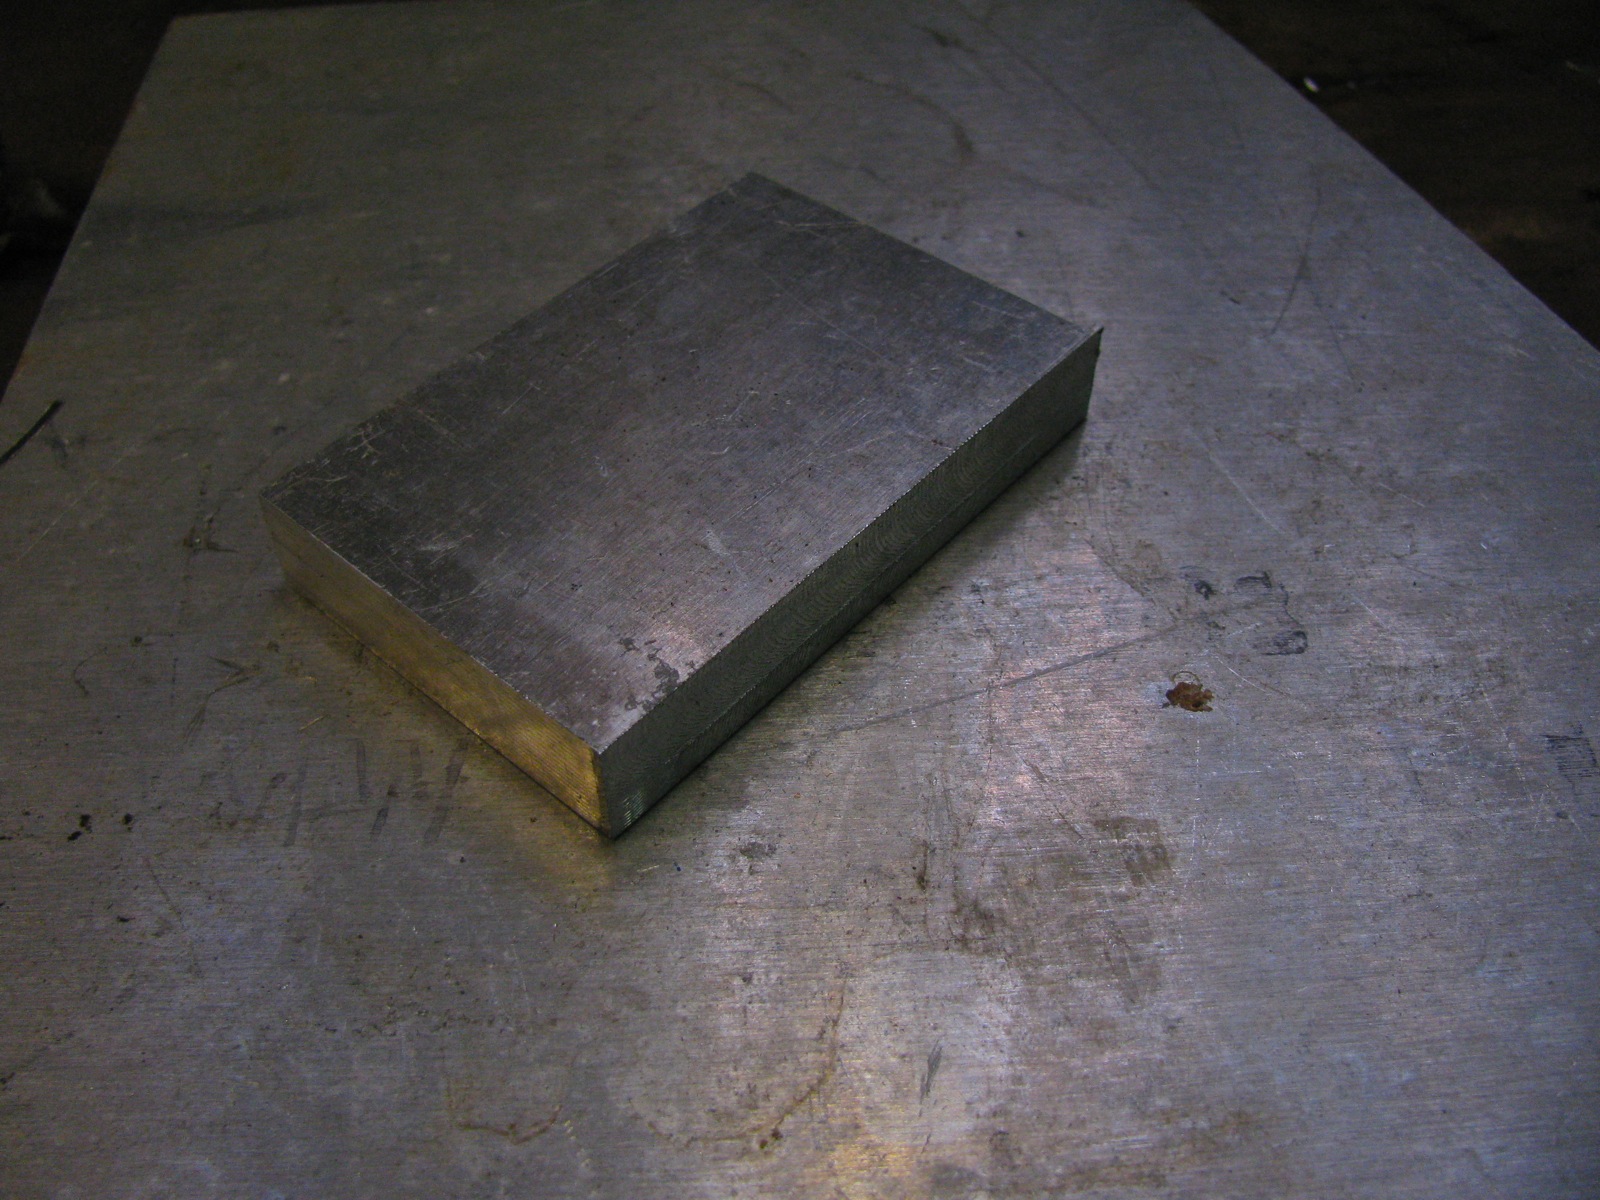
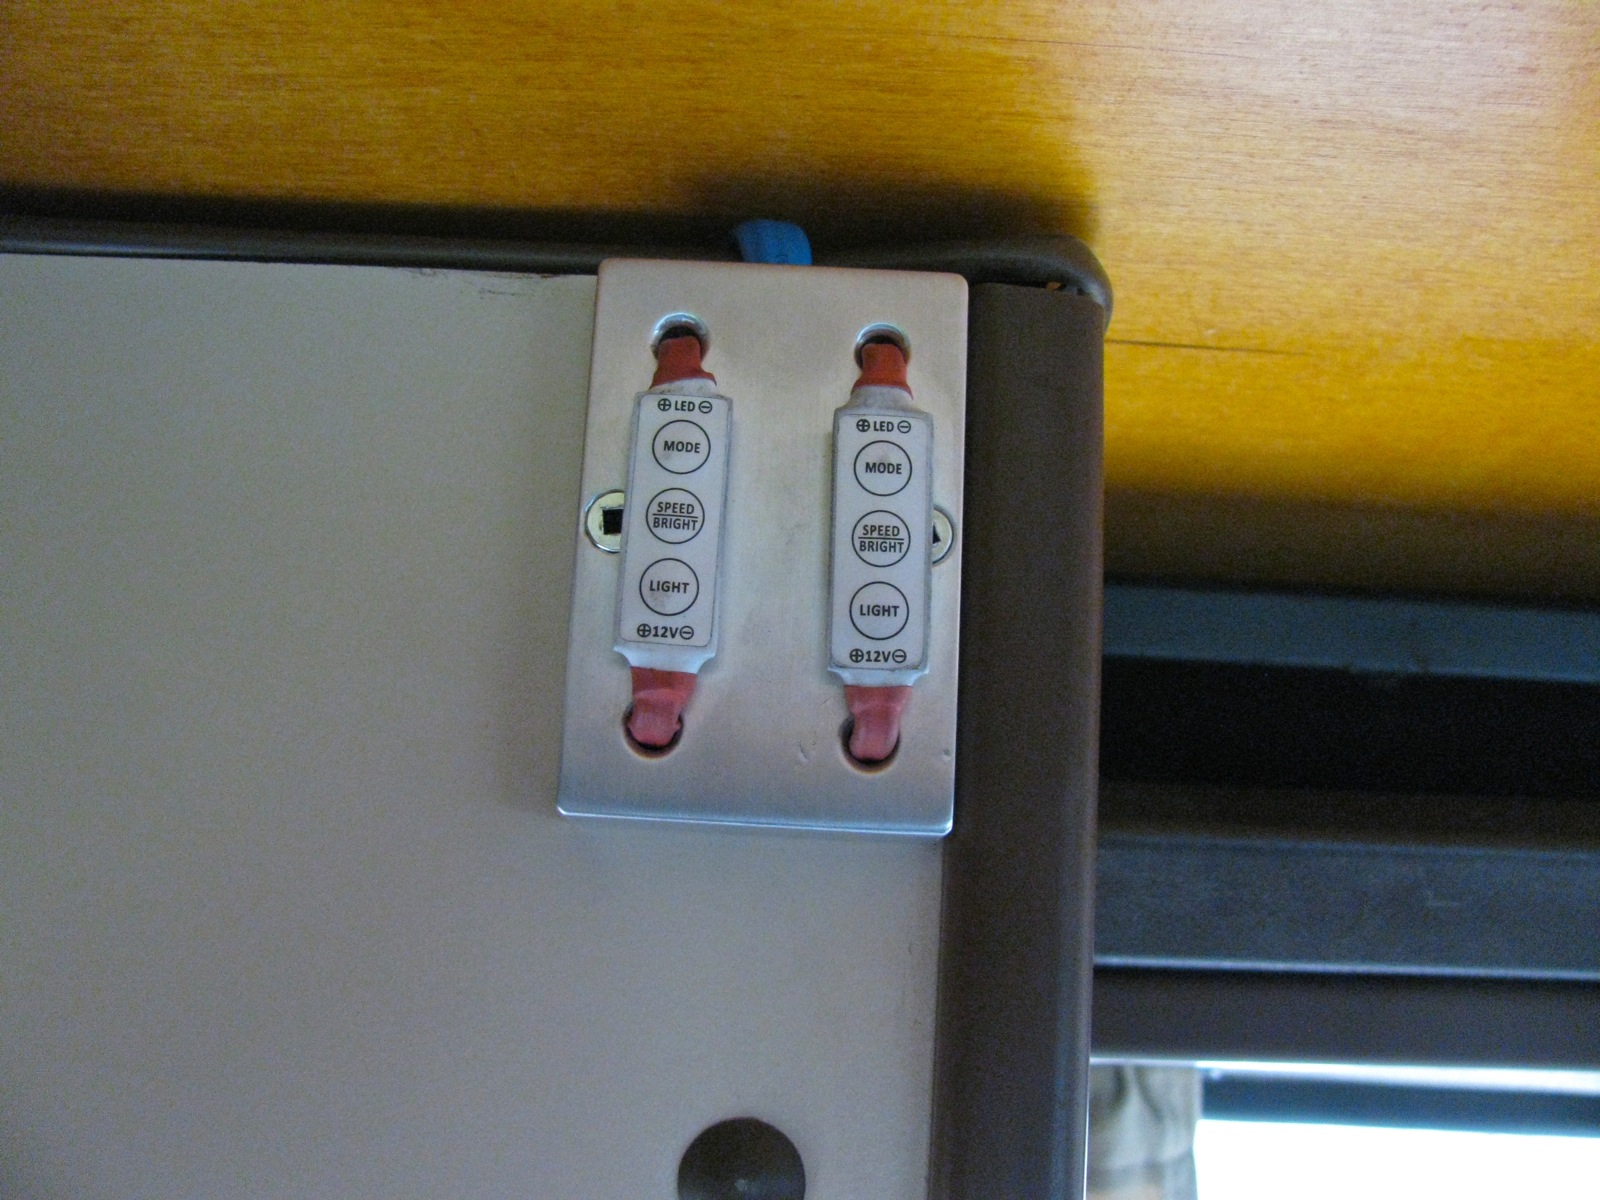
A bit of 1/2″ aluminum.
I really just eyeballed the milling (used the wee milling head for my lathe).
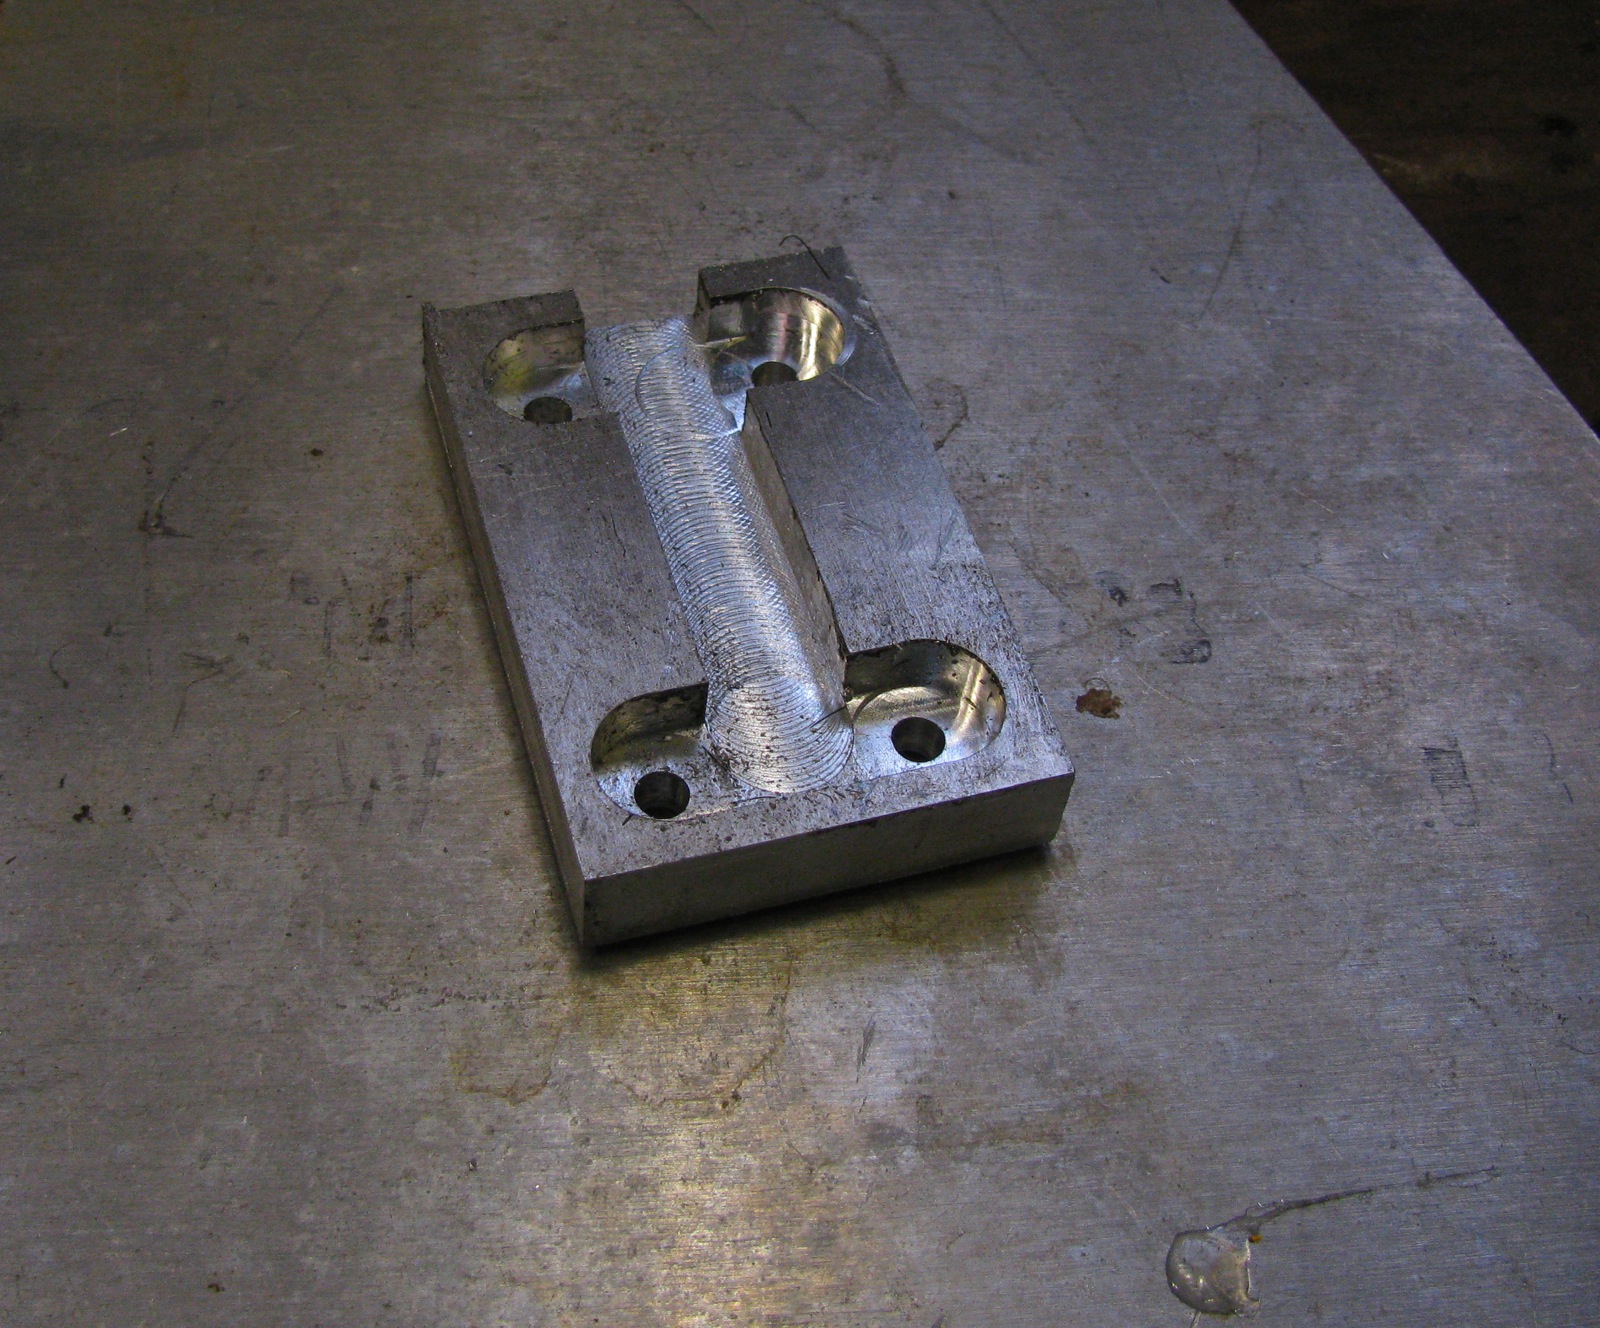
Then a half hearted clean up. I need to get a better countersinks, see the chatter marks in the holes, especially the mounting screws?

And the dimmers added.
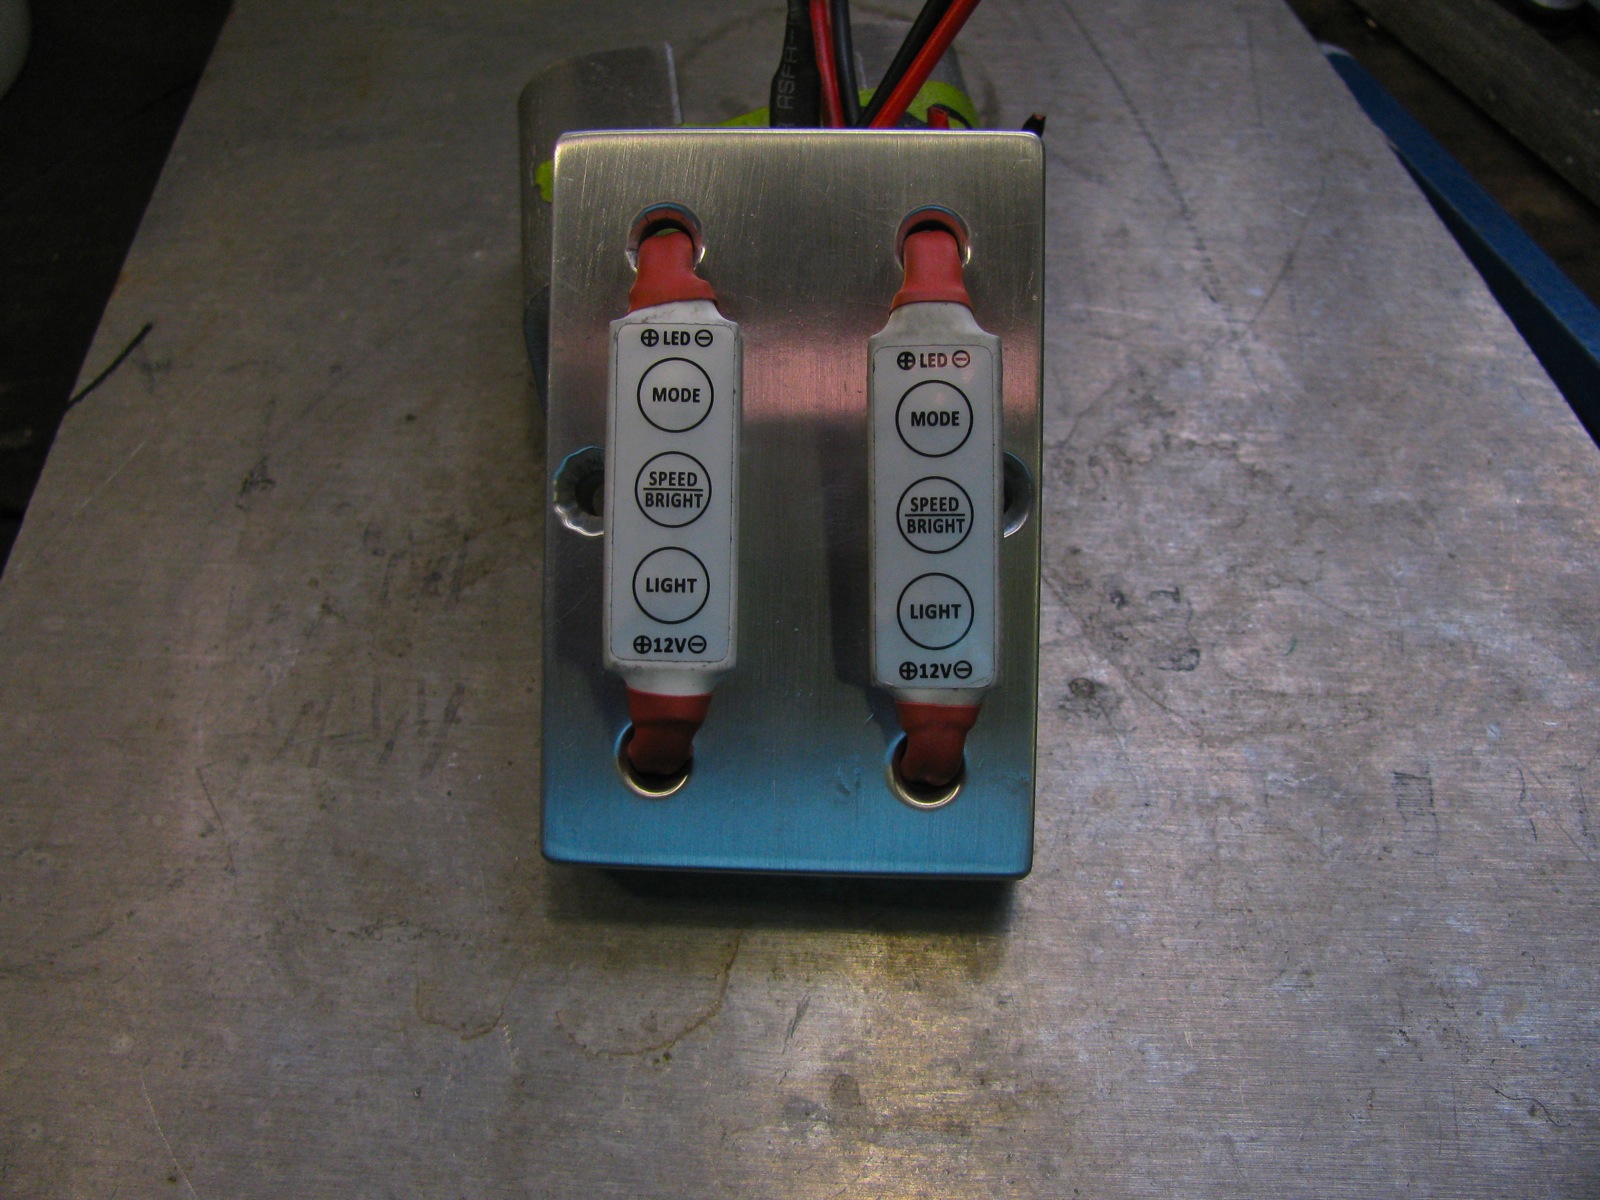
The milled slots use now clear. Can I draw your attention to the black heatshrink on the ends of 2 pairs of wires? I forgot to remove one of them, grr.
I secured the wires to some extent with some Goop. The heat shrink job was redone a couple of times after this, you’ll find out why.

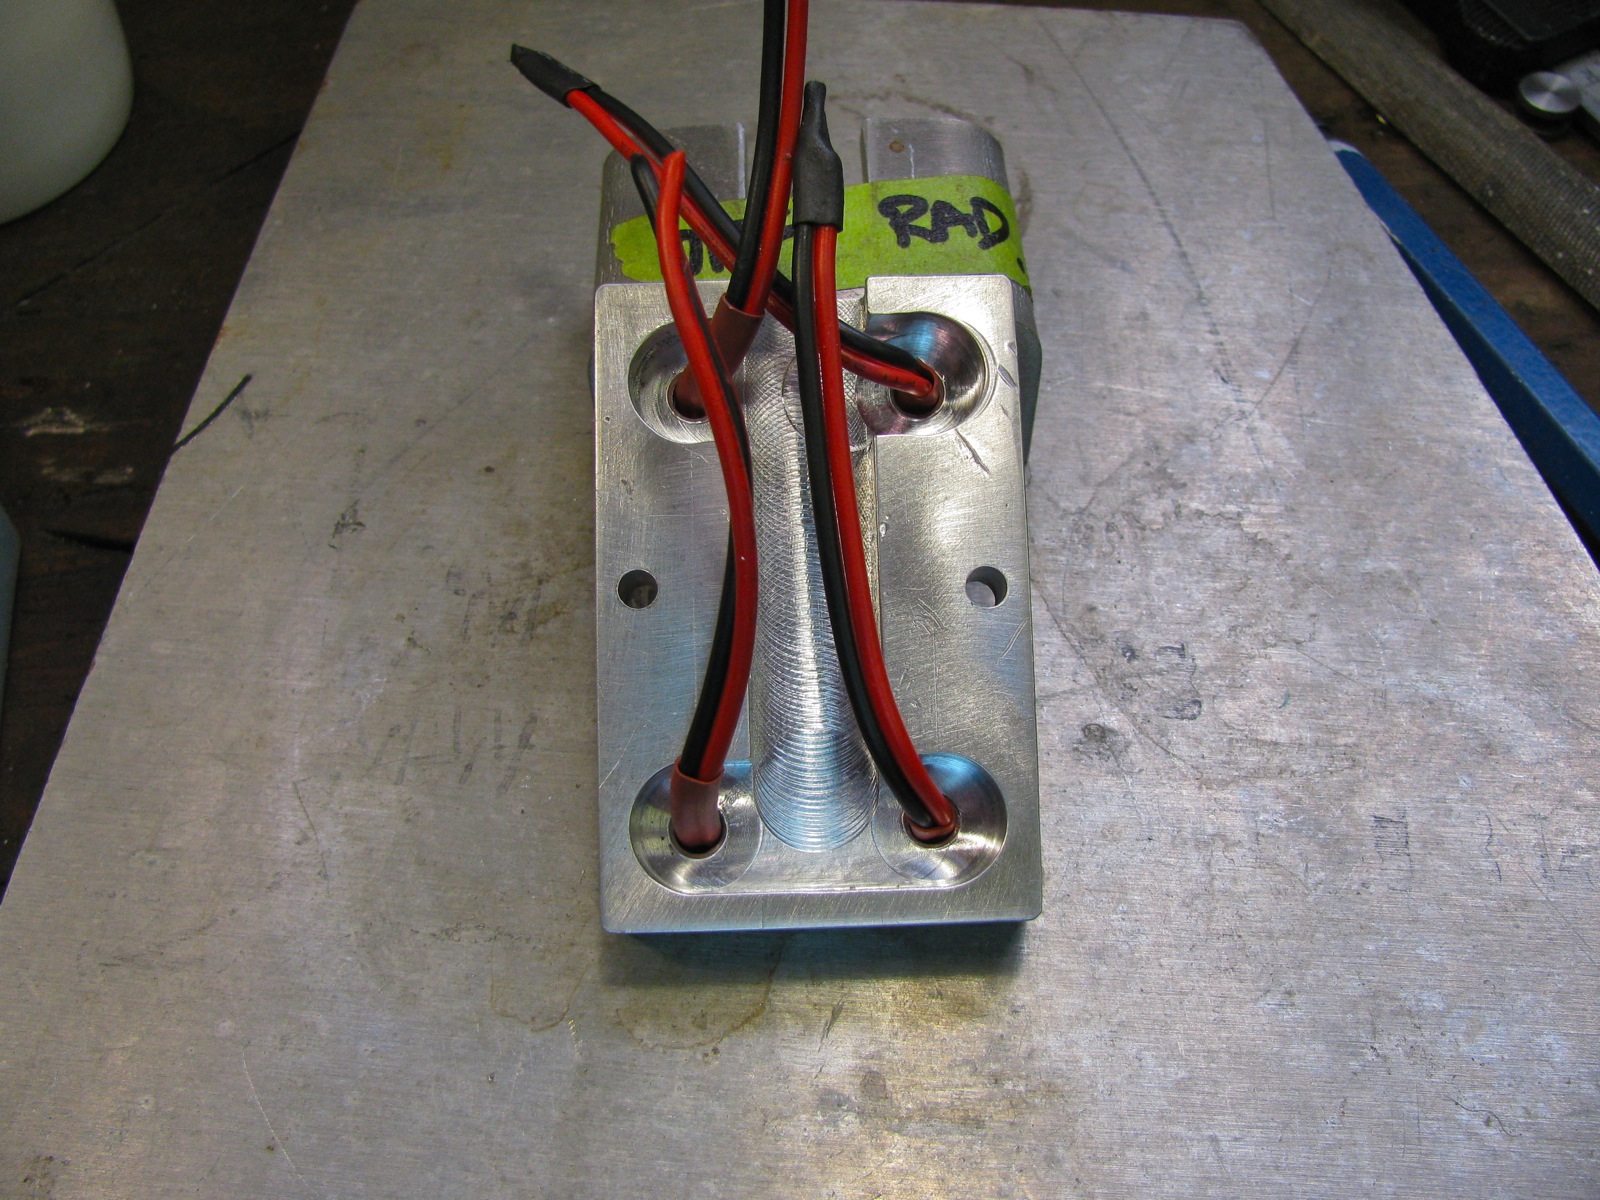
And installed on top front inside corner of the wardrobe. I figured I could reach the dimmers when lying in the lower bunk.
The leds strips were installed in two places: one on the underside of the kitchen trough so that it pointed straight down. The other on the angles face of the slider door valence. The latter shines in and down. So I wired the strips to the dimmer and during the process forgot about one of the heat shrunk wire ends, and I shorted one dimmer which let out a little magic smoke. Stupid mistake eh? I left the broken dimmer in place and re-rewired things so that the remaining dimmer controlled both strips. Troubleshooting this screw up resulted in re-doing a lot of connections, sigh.
This pic makes the slider door side strip seem brighter and more glaring than it actually is.
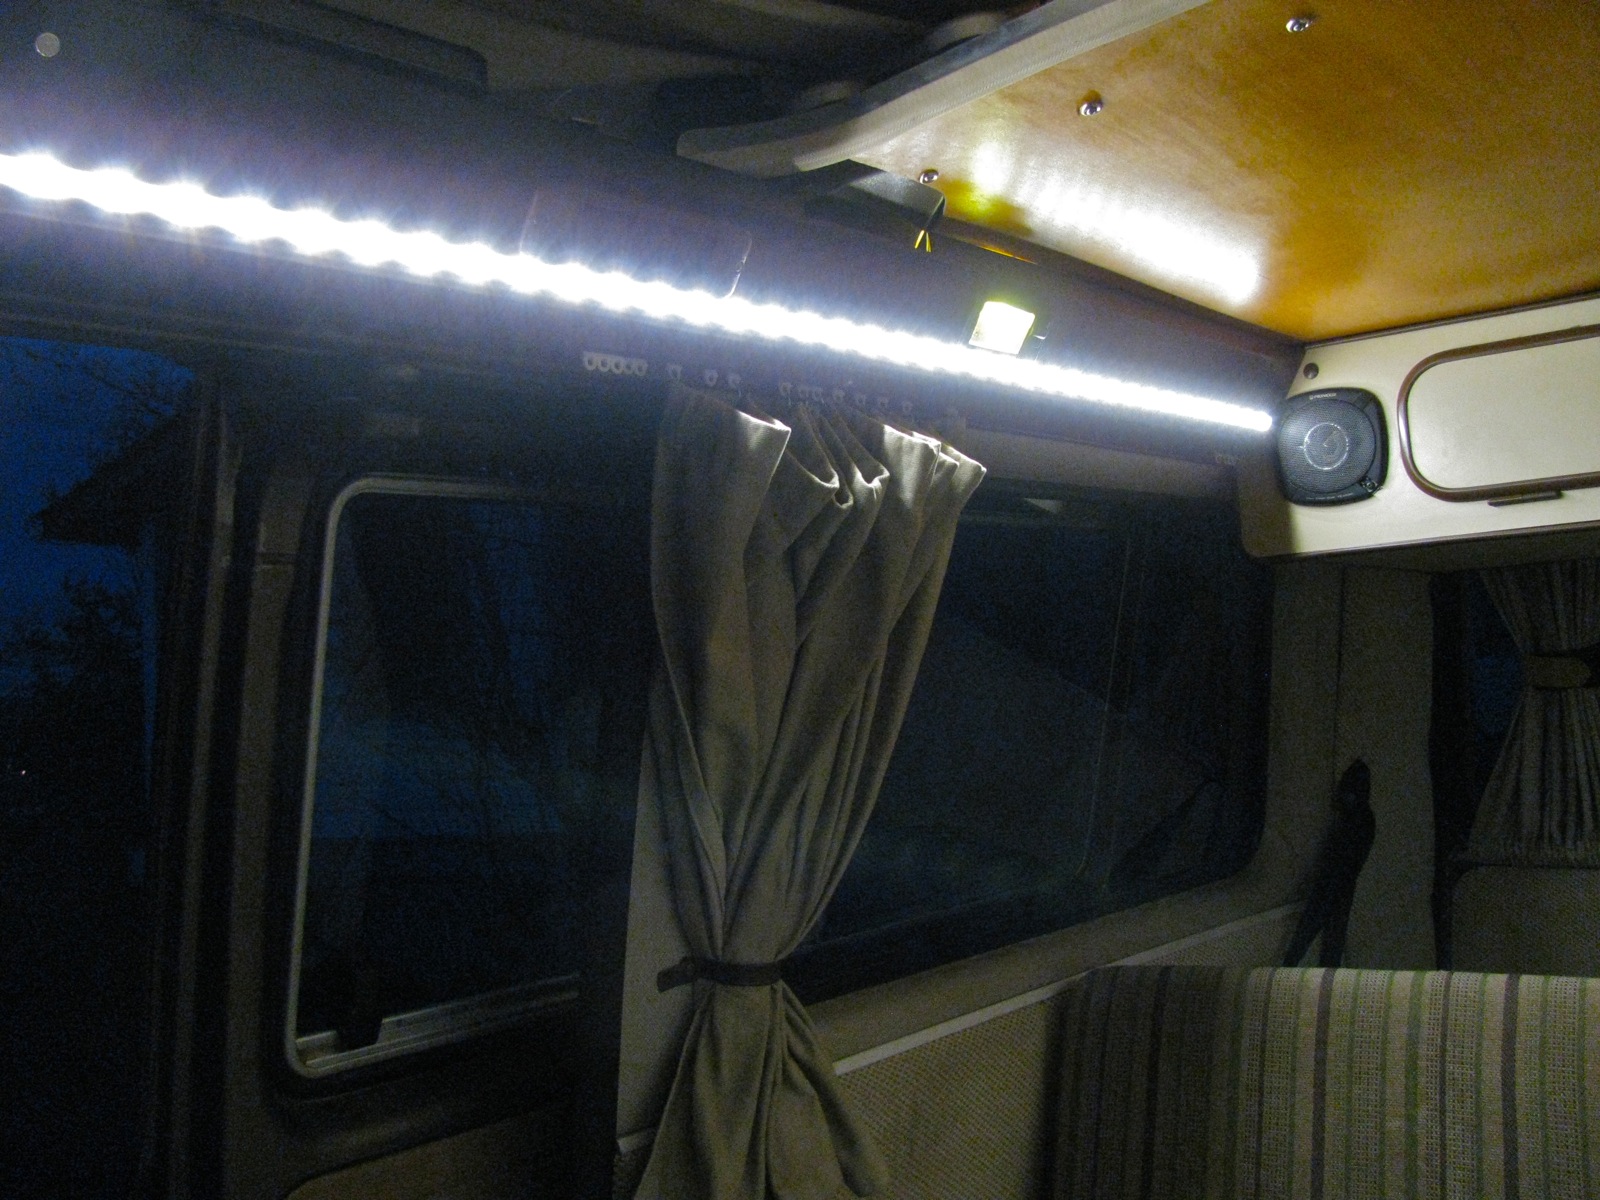
The kitchen side strip has no real glare, I’m guessing the beam angle of the leds is about 120 degrees.

I’m very happy with the amount and quality of the light these strips make. I’d like to add more, and maybe even some RGB strips and a colour mixer.
Addendum : I forgot to mention how much power the lights draw – if I recall correctly it is around 4.8 W per strip. I know nothing of how PMW controllers work, ie how much power is used by controller and strip when light is dimmed down low.
Another addendum:
I did some measurements with my installed Doc Wattson. Measuring current flowing from my aux battery.
first, van as is:
leds off, 1W, 85mA
leds full on, 9W, 750mA
leds dimmed lowest setting, 1.7W, 140mA
Radio face plate off:
led lights off, <0.1W, <10mA
For interesting comparison, kitchen water level/battery meter panel on, led lights off, between 0.2 and 0.3W, between 20 and 30mA.
So the led dimmer control draws a little power even when off, but it is less than the “switched on” kitchen indicator panel.
So the led strips, both sides combined, only draw 140mA power at lowest brightness. And that low setting is pretty good for a standby/casual use light.

#1 by Geneva on February 24, 2013 - 7:37 am
Could you mount the dimmer switch just inside the door (near seatbelt bracket) so you could turn on as you enter and off as you leave? Your craftsmanship and work is amazing!
#2 by albell on February 24, 2013 - 7:53 am
Hi,
I went back and forth with this choice and that for switch placement. Getting power and running the wires was a big consideration, that pretty well sealed the deal for the final placement. But… you can get wireless controllers. Btw, Lee Valley just started carrying led strips and controllers. Not the cheapest source but good in that you can go to shop and see them in the flesh. The wireless controllers they sell are a bit big though.
Oh, almost forgot, Jerome (http://famillysyncro.wordpress.com/) did put dimmer in spot you suggest.
And thanks for the compliment.
cheers
ab
#3 by famillysyncro on February 24, 2013 - 8:26 am
Nice job Alistair as usual.
I like the bracket to hold those dimmer but I am not sure if I could call it a bracket as usually a bracket is a bent piece of steel……sadly, no one knows about the work done when it is in place…
I think you found a nice place to put those dimmer. As long as you keep your others “door light”.
As for the wireless controllers as you mention, some are bulky and there is always the problem of: Where the hell is that remote….especially when camping away with a lot of stuff everywhere.
I am not sure neither how those controllers work but I remember someone on the Samba using dimmer same as mine talking about the necessity to add a switch as when the potentionmeter is off (as well as leds), there is still a current draw on the battery.
Maybe one day, I’ll check it…..
Jerome
#4 by albell on February 24, 2013 - 8:40 am
Jerome,
yeah bracket not the right word, “mounting plate” better?
I agree wireless can be/are bulky:
http://www.leevalley.com/en/hardware/page.aspx?p=70325&cat=3,43629,70322
My inline controllers do draw when off, but stated draw is supposed to be under one watt (80 mA). I’ll check and see if I can verify using my Doc Wattson.
I did keep my other door activated lights. And there is no reason why I cannot add more strip leds and tie into door switch. What I have done so far is really with camping in mind.
cheers
ab
#5 by famillysyncro on February 24, 2013 - 8:57 am
It seems the stuff from LeeValley is more for home use but looks really nice.
This one is sweet and deal with color as you are planning:
http://www.superbrightleds.com/moreinfo/controllers/ldrf-rgb6-tc2-rgb-controller-sync-able-rf-touch-color-remote/875/2163/
It looks like a mounting plate when in place but again, knowing how it was made, “mounting plate” isn’t good enough. But, hey, don’t waste you time with me, I am pretty sure you have way better to do with your brain….. 😉
Just watching news, it seems the weather is getting interesting in West BC….
Have a nice day.
Jerome
#6 by albell on February 24, 2013 - 9:07 am
Yes, that’s the ticket. I’m imagining rgb strips up in the pop top providing warm light there.
Weather always interesting here 🙂
ab
#7 by famillysyncro on March 1, 2013 - 7:33 am
Morning Alistair
I did some current draw testing on parts of my led system with an ampere meter, that should interest you:
http://famillysyncro.wordpress.com/2013/03/01/led-inside-light-current-draw/
Dimmer goes as low as 10mA (about 0.1W under 13V) when led are off, it is not bad after all.
Jerome
#8 by silversquarelofts on June 27, 2013 - 10:44 pm
Hi, this is a great write up. I just bought similar LEDs that I plan to install in my Westy but I’m not finding much info online about how to setup the power supply. Do you mind sharing what you did?
Thanks!
#9 by albell on June 28, 2013 - 7:29 am
Hi,
I just scribbled down some thoughts in your other comment. Let me know if you need more details.
alistair
#10 by silversquarelofts on June 27, 2013 - 10:45 pm
Hi , do you mind sharing how you setup the power supply?
Thanks!
#11 by albell on June 28, 2013 - 7:28 am
Hi,
quick reply…
the strips are, as you know, nominally 12V (the range of expected voltage differs from manufacturers). So you could just wire them directly to the car’s electrical system and use a simple switch to control. But if you want to dim the leds you really need a PWM (Pulse width modulation) controller. I think I’ve linked in my post to where I bought mine.
So where to tap into the van’s electrics to get 12V? In a westy I would tap into the circuit that powers the kitchen. On the base of the B-pillar, at the drivers left buttock, there is a little plastic box that contains 2 ceramic fuses. One fuse is for the fridge 12V power circuit, the other is for the kitchen (water pump, control panel leds, fridge fan). So you can trace the wire and find a suitable spot to tap into.
Running wires to each LED strip can be as easy or as hard as you want – all depends on how hidden you want the wires to be.
let me know if you need more info,
cheers
alistair
#12 by silversquarelofts on June 28, 2013 - 9:44 am
This is great info. Thank you! I just bought my Westy a couple weeks ago and bought the LED strip after seeing I googled Vanagon LED lighting and saw pics of your installation. So now I have the lights and am just learning about the auxiliary battery idea. Can’t wait to set it all up. Thanks again!
#13 by albell on June 28, 2013 - 9:48 am
Feel free to pester me with questions about aux battery install and wiring. I know too well how confusing it can be at times.
cheers
ab
#14 by silversquarelofts on June 28, 2013 - 9:54 am
Thanks, AB. Appreciate that. I checked out the Aux Battery video on YT (http://www.youtube.com/watch?v=LAFbbgEBlMc) and I think my only question right now is whether or not there’s a higher Ah battery on the market yet that will still fit in the same space under the driver’s seat. I did see there’s a slightly larger 35Ah battery on Amazon (the video uses the 22Ah). Is this the setup you used for your aux battery?
#15 by albell on June 28, 2013 - 10:00 am
quick reply, I have to get going…
one “best bang for your buck” approach is to buy a good group 41 battery. Just like the starting battery. You can find them for a good price and depending on your loads, can last for a good time. I found my teeny 30 A/hr AGM at walmart. I have very little load on it when camping and I thought it was a good buy. But if I was to buy one today I’d go for a group 41 unit. Deep cycle batteries can get very pricey, and you can screw them up (not fully recharging etc).
cheers
ab
#16 by silversquarelofts on June 28, 2013 - 10:52 am
thank you!
#17 by oldfussbudget on July 8, 2013 - 4:45 pm
Hah, catching up from when I was non-functional. Lovely work on the control panel!
On PWM stuff, it works by rapidly switching the power on and off and varying the length of time it stays on (duty cycle, technically). The result is a rapidly flashing light that if done correctly you won’t notice flashing. The switching is pretty efficient but there is also some control overhead. The circuits could no doubt be designed at extra expense to shut down into very low power mode.
#18 by albell on July 8, 2013 - 5:07 pm
you can detect that strobe effect when lights dimmed by waving hand in front of lights. God only knows what effect that has on my brain.
Power requirement does go down with dimming, I can measure and report if desired.
ab
#19 by oldfussbudget on July 8, 2013 - 5:24 pm
Don’t do it for me. The numbers will be somewhat different for every controller and likely every supplier of LED strips. But in general there will be a fixed overhead, an on-time resistive loss through the switching transistor, and a constant switching loss (assuming the switching frequency doesn’t change with duty cycle). Assuming the device has a definite off setting the switching loss will go away.
#20 by albell on July 8, 2013 - 5:26 pm
I’m going to do it anyway, for one strip.
ab
#21 by Dave on May 6, 2014 - 1:05 am
Hey just caught your great post and could use some advice on running wires for LED just like you have. Did you have to use solder or connectors of some kind to wire up the cut portions of strip lighting? Where did you run your wires for each of those strips? I’d like to mount a strip and dimmer switch there so I can turn a light on from the slider door, but having a hard time figuring out how to run hide wire across the van.
#22 by albell on May 6, 2014 - 12:24 pm
David,
Got the comment, will answer later today.
Ab
#23 by albell on May 6, 2014 - 9:50 pm
Hi,
First off, if you haven’t bought any led strips yet might I suggest looking at what lee valley is selling now. They started to carry led strips justs after I had bought some from other sources. I did buy a length from them though, and the warm white they carry is really nice. And they sell connectors which ales wiring easy. I soldered wirspes on to my strips and then secured with a blob of rtv silicone. But the connectors would be much better. They also carry anodized aluminum channel and snap in diffusers. I will be buying some of that.
I ran wires across the van in the channel screwed on the underside of the westy bed, right above the rear seat. The channel comes off easy.
Might I also suggest running dedicated power and ground wires to the strips/controllers rather than tapping off existing power. That might mean you need a little aux fuse panel or distribution strip, but it will pay off.
Sorry that this note is rather brief, I am happy to clarify or answer anymore questions.
Cheers
Alistair
#24 by albell on May 7, 2014 - 10:48 pm
David,
Corrections in my last comment. I confabulated the wire routing. I used the cross beam on my friends van, on my van I ran the wires in the upper rear cupboard.
Also, today I picked up some track and connectors form lee valley. The connectors look good, but are made for a specific width of led strip. I think, but have not tried, that you can cut down the width of wider led strip to fit in the he connector. I have to try it, I have some various width strips on hand. The ones nag would be the spacing of the electrical contacts on the strip. I’ll take some pics and make a blog post.
Alistair
#25 by Dave on May 8, 2014 - 9:52 am
Ok, thanks for the info! I ordered some connectors, but they won’t be here for another few weeks. I already bought some warm white LED strip and I’m probably going to try the solder method and see how it goes. The area I’m clueless on is how to wire in my inline dimmer (http://www.amazon.com/gp/product/B00A5193J8/ref=oh_details_o00_s00_i01?ie=UTF8&psc=1) into the existing over-the-sink light wiring. I have a BlueSea fuse block that I’m connecting these to for power. Gonna have to search for a tutuorial on that one.
Is it possibleto use the driver overhead light and passenger dash maplight – and replacing the existing bulb with a small section of LED strip?
#26 by albell on May 8, 2014 - 5:48 pm
Off to see my son in a production of Antigone, will reply later.
Ab
>