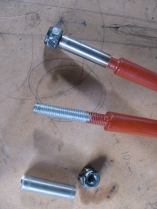
Between watching the Big Game and other things, I made some metal sleeves and convex washers for my sway bar drop links. The sway bar is off the van due to a broken link which I repaired earlier . A broken drop link seems to be a common thing, and its due in part to the steel sleeve inside the rubber bushings trapping water and rusting. This can cause the drop link itself to rust and also when the sleeve rusts out may allow the drop link to move more than it should, stressing it. I fixed the link by facing off the broken stub, then drilling into the link and tapping for a 10 X 1.5 mm bolt. The bolt was screwed in and tack welded. The bolt head was then removed and threaded portion cut to size. The picture shows the repaired link and beside an original. The stainless tubing was just an early try at finding a sleeve.
And just because I thought it a neat idea, I made bushings out of old skate board wheels.

I guess a diagram is needed showing all of the parts…

I needed to make new washers and sleeves (spacer tubes in diagram). The washers are dished and made of steel. The spacer tube is thick walled steel. I am not sure if the washers are still available, and I really wonder if the dishing is needed (allows more “wobble” in the drop link-rubber bushing connection).
First the sleeves. Some schedule 80 stainless tubing was found at the local Metal Supermarket (I took drop link along for trial fit). I don’t know what the listed size of this stuff is, but a casual measure has it at 0.675″ OD and 0.42″ ID. The tubing was cut into 40 mm lengths (well, that’s what the rusty old stock sleeve was). I nipped out to test fitment in the hole in radius arm and found it was too large in diameter. I had to turn the sleeves down to 0.650″ diameter for an easy fit.
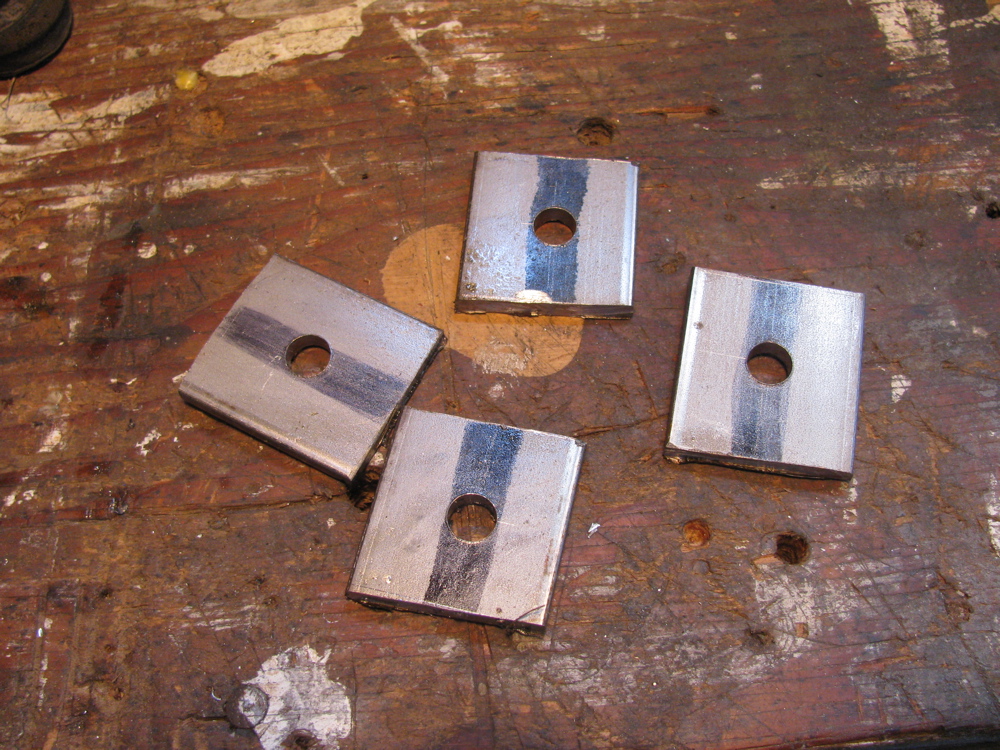
At this point I should mention that I am not a machinist, nor am I a talented amateur, so forgive any bad technique shown and the quality of the finished work. Now onto the washers. I had some stainless bar in the workshop, 1.5″ wide (not quite as wide as the stock washer diameter, you’ll see evidence of that in the pics), 0.187″ thick and I cut it up into rough bits, drilled holes in them and mounted them all on a really dodgy mandrel/spud/spigot/whatever on the lathe. Not the best technique, had to go slow and light to avoid hammering. Of course it would have been better if I had made them into hexagons at least before turning. Anyhow, I made the stack round. Then I mounted them individually on the mandrel and gave them a slight crown. Took a while but I still have my eyesight and digits.
The sturdy new washers are thicker than the old washers and this may be a problem when it comes to installing with the rubber mounts. If needed, I’ll shorten the sleeves by a couple of millimetres or so. Oh a couple of points… I was working on the “other side” with the lathe in reverse when making the washers convex. And you can see evidence in the finished washers that my stock was not quite wide enough, not big deal, just aesthetically crap.
Oh, one more thing, I ground off the little collar seen around hole in washer after I took the pics. The collar was left over from the lathe work. When the washers and sleeve are assembled on the drop link, and the nut is tightened, it all feels pretty solid and strong. I still would like the sleeve to be a snugger fit on the drop link, but probably is just fine as is.
I need to find some rubber bushings now. You can buy stock ones, but criminy, they cost $10 a pop!
Edit: see here for sleeve modification


PS. For images and prices of the “real” parts, check this page from Van Cafe

#1 by Simon on March 1, 2013 - 8:18 pm
Informative and impressive! Thanks.